Painting Weather Resistant Heraldic Banners

Posted with permission from https://kaloethina.wordpress.com/


Original post appeared March 2, 2016.

I’ve recently received some requests on how to paint heraldic banners for use outside.  I really enjoy painting heraldry on canvas, as I feel it looks more period. (I love silk banners – really, I do, however, silk in period was a luxury, and reserved more for clothes than for something would have whipped around in the wind or thrown on the ground or any number things that just shouldn’t happen to good silk.  I might be Byzantine, but I digress.)

Heraldic banners – often a determinant of friend or foe across the field of battle, were also a form of decoration, whether by hanging from the rafters of a great hall or by adding pizzazz to a processional. Additionally, painting canvas in a trompe l’oeil effect was used to great degree during the Field of Cloth of Gold, where the elaborate accommodations (in this case, canvas pavilions), were decorated in and out with lush painting, though these were less heraldically inspired in nature, though it is noted within a folio of designs for the Field of Cloth of Gold, that some pavilions are painted with gold fleur-de-lis on a blue background, an excellent use of heraldry for France.1

The process in period consisted of a ground or gesso layer, followed by the painted layer (usually oils in later SCA-period), similar to other painting preparation processes for wood panels within the Italian and Northern Renaissance.2 Painted fabric, usually linen, was abundantly mentioned, famously in Shakespeare3, – items from clothing to wall-hangings to religious paraments, and as noted withing the diary of Prior More (p84), the cost of painting and sewing cloth for banners.

Lynnyn cloth for ye lyttle hawle at Batnall s d
Item for lynyn cloth for bordurs to ye lyttul parlour
withyn the lyttul hall and ye parlour at Batnall ………………….. 12 0
Item for the peyntyng of ye same to Thomas Peynter …………. 3 4
Item for sowyng of ye honggyng sayes in qe seyd parlours &
for thryd ………………………………………………………… 4
Peyntyng of bordurs. Item payd to Thomas Peynter for
Peynting Ye bordurs in ye lyttal parlour withyn ye lyttul hawle .. 5 4
Item for lynnen for bordurs to peynt for the hall at Grymley …… 2 5
Item for the peyntyng of the same to Thomas Peynter ……….. 2 8
Item for xviii (18) ells of canvas for peynted bordurs to Crowle……. 6 9
Item payd to Thomas Kings for peynting of the bordurs of my
Chamber & ye deyesse (Dais?) at Crowle conteyning xlvi (46)
Yeardes price of every yearde 2d Summa 7/8
Lynnen clotthe. Item payd for xxxvi (36) ells of sultwych for
To make borders to peynt with price the elle 4 ½ d Summa …. 13 6
Item to John Taylor for sowyng the hangyngs with says in
The Lords Chamber at Crowle & the Dessyse in the hall
There with other work ………………………………………… 7 6

Many of the banners and tapestries of this period are of scenes of Biblical subject matter, however, given the use of heraldry in the nobility, it is possible that banners in this style could have been used by nobles on the lower end of the economic scale.

Most banners I make, while painted with completely modern materials for durability and non-to-low-toxicity, still are in the style of medieval banners and painted canvas of the period. The process (for which I would like to thank Mistress Fionnuala inghean Fhearghuis for teaching it to me!) is as follows.

Materials needed:

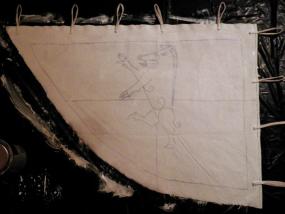
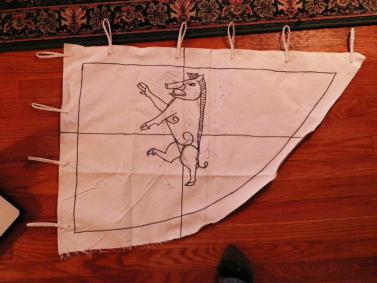
My canvas blank. This will eventually become a Norseman’s weathervane-type banner.

My canvas blank. This will eventually become a Norseman’s weathervane-type banner.

Canvas duck or some other medium-to-heavyweight canvas
Eggshell, satin, or matte exterior latex paint, no colour added (I used eggshell)
Pencil
Sharpie or other permanent marker
Craft acrylic paints (seriously, buy the cheapest paints out there – don’t waste your good acrylic paints for this project.  I’ve used Apple Barrel, Folkart, and CraftSmart brands all with good results.  For colours: I recommend buying strong heraldic colours for heraldic banners, like bright reds, schoolbus yellow, bright greens, ultramarine blue, medium violet, bright whites, and licorice blacks. It is at this point that you can choose to make details, like shading. A note on blacks and whites – mix a dark charcoal colour, so that shading can still occur on your black charges. Use a light grey a shade or two darker than your white. All other shades can be created by using white or black with your other colours.)
Paint brushes, both foam and traditional (Do not use your good brushes. Canvas is very hard on brushes, and you will need to get into the nooks and crannies of the canvas.)
Clear acrylic sealant spray
Thread and needle or grommets

Optional: projector or someone who help you draw.

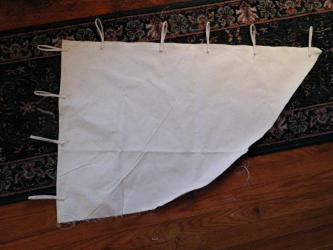
bannerinkCut fabric (preferably canvas) in desired size and shape. The fabric can be sewn at one of two points. The first point is here, prior to painting, where it may be easier to ensure the fabric is the right size and shape.The next step is to sketch out your design in pencil, and then when the sketch is complete, go over the lines with a permanent marker.  Don’t try to erase your lines – you’ll get eraser gunk all over the canvas, which will cause issues when it comes time to put the base coat down.

bannerpencilThe next step is to take eggshell or matte exterior white latex paint (interior/exterior latex also works, but I usually use paint marked for exterior paint), and paint it over the surface you wish to paint with foam brushes, really making sure to work it into the canvas. This acts as a ground for the subsequent layers, and will make the colours you place over it brighter. This will also make the paint layers more durable. You will be able to see faint marker lines.

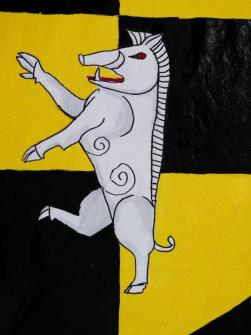
At this point, your canvas is a giant colouring book. Starting with your lightest colours and moving to your darkest, paint your heraldic design with regular craft acrylic paint (I used 95¢ craft paint).5 If you’re shading at this point, add those in at this point to better blend your colours.  Mr Pig didn’t get a whole lot of shading, but on later projects, there’s a lot of shading and a lot of blending and a whole lot of diluting paint to make it blend better.  It is acrylic paint, after all.  Another word to the wise – painting two sides at once will make you crazy.  Make sure all paint is dry before even thinking about painting the other side of a two-sided banner.  Trust me.  TRUST ME.

Once your paint has dried and you are completely done with painting, go over your charges with a permanent marker. This does one of two things: it makes the charge pop, and makes it easier to determine the charge from across a hall or a field.

At this point, you can also sew your banner into its finished shape, though it will be closer to sewing a light leather than the canvas by itself, which is why I prefer doing all of my sewing prior to painting.

bannerdetailLastly, you will need to spray your banner with clear spray paint. This further protects the design from the elements, and gives the fabric a nice sheen.  It also gives the banner a more finished look.

If you paint your banner, let me know how it turns out!  I’d love to see what you’ve accomplished!


Bibliography

1Tent design for the Field of Cloth of Gold, British Library, http://www.bl.uk/onlinegallery/onlineex/henryviii/militmap/tentdes/ accessed 05/13/15.
2Wescher, H. “Embroiderers and painters of flags.” Ciba Review 77 (1949): 2825-30.
3An important, mid-17th century, painted and stained, linen, hanging cloth – Art & Antiques Online – CINOA http://www.cinoa.org/antiques/d/an-important-mid-17th-century-painted-and-stained-linen-hanging-cloth/36641, accessed 05/12/15

Kingdom Arts & Sciences Court summary, April 09, A.S. 50

Osgar of Grimfells – Torse
Sabine of Carlsby – AoA
Rosie Haley – Queen’s Chalice
Hirakawa Kagetora – Leather Mallet
Melanie de la Tour – Golden Calon Swan

Other court news:
Jaida de Leon – new Kingdom Arts & Sciences Champion
Lillian Bowyer won the Judges’ Choice award
Paul Adler is the new Kingdom Minister of Arts & Sciences
6 people received Newcomer mugs
A boon was begged for Isengrim Sleggja to join the Order of the Laurel

Tutorial: Diamond Point Engraving

Reposted with permission from https://kaloethina.wordpress.com.


Original post appeared October 19, 2014

About a week ago, I posted photos of my Rose in Any Medium goblet entry that I did with diamond point engraving.  I also promised those in the Artisans of the Society for Creative Anachronism Facebook group that I would publish a tutorial on how to decorate glass with this technique.

Here’s what you will need:


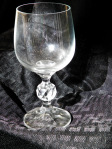
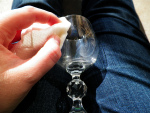
100_4986A glass object
(most engraved pieces in period were either goblets or plates.  I’ve had better luck with goblets, but your mileage may vary.  I purchase most of my glass for these projects at thrift stores, but I’ve also had luck finding cheap Libbey-ware at the dollar store.)

Permanent markers (I am fond of using multiple widths – I’ve got brush tips, fine tips, ultra-fine tips . . . they all work for this.  Do not use china markers for this project.  Repeat.  Do not use china markers for this project.  They will mess up your diamond tip.  Don’t ask me how I know.)

Rubbing alcohol (you’ll see why later!)


100_4987A diamond-point engraver
(these can be purchased from Ted Pella as a “diamond scribe,” and it may be more inexpensive to go with an angled tip and with a pair of pliers, gently shape into a straight scribe.  Originally made for the science industry, these are great for creating random bits of SCA pretty!)

Paper or low-lint fabric towels (again, you’ll see why later)

Safety glasses (you will be making glass chips.  Need I say more?)

Optional items

A plastic storage container, lined with soft material (mostly because I have found that this can be very taxing on hands, and well, glass is fragile)

A pencil grip (you are putting a lot of pressure on hands and fingers on a metal scribe, which fatigues the hands.  Using a pencil grip to help cushion may help you out)

Sketched art of common motifs as found in period and tape (if you have difficulties drawing, but can trace, this can help you out a lot)

Process

Ready to get started?  Excellent!


100_4992Step one:
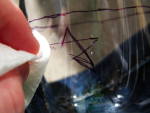
Use the rubbing alcohol and paper towels to clean your glass of any oils, gack, or china marking pencils (like my local thrift stores are fond of using).  You may also run your piece through the dishwasher, and then use the rubbing alcohol, but the key is to have a super-clean surface.  The reasoning for having a super-clean surface is so the engraver can stay in contact with the glass as you sketch your drawing onto it.  Also, take this time to inspect your piece.  It should have no bubbles, cracks, etc.  If it does, this can cause the piece to break while you’re working on it.

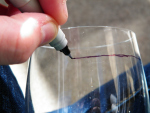
Step two: Take your permanent markers, and start sketching your design on the surface.  If you cannot
100_4995draw, tape art of your motif on the inside of the glass, and trace with the marker on the outside.  The downside of this method is that the design can become warped. When you do your layouts, remember that what you draw out will look frosted over, and while you can do hatching, it will look darker or different.
100_4997Do not worry if you make a mistake at this point.  Use your rubbing alcohol to clean up any mistakes and keep going – at this point, you’re doing your layout, and details may change from this point forward.  Also, do not worry if the ink comes off before you want – keep your permanent marker nearby and draw the detail back in.

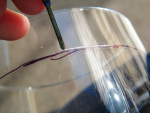
Step three: Put on your safety glasses, uncap your engraver, and start scratching away on your lines.  Every engraver has a “side,” meaning that there
100_5000 is a sharper side that will be easier to scratch with. Additionally, you will need to use some pressure, and this is truly the nerve-wracking part, as calibrating the proper amount of pressure takes practice.  You’ll also want to be able to wipe away glass chips as you go, as these can accumulate on the glass itself.  At this point, you’ll be scratching on the lines you’ve drawn on the outside.  Work until you’re happy with it.

Tips

For straight lines going around the glass, you can place your engraver on a pile of books or magazines, press down on the engraver, and rotate the glass.  However, depending on the thickness of your glass, this may or may not remove a well-formed ring of glass (which looks cool, yes, but shortens the glass and can create further issues, as the rim is now sharp).

Have spare glasses at the ready.  Breakage doesn’t happen often, but it is a risk.

Taking the Leap: Moving from Painting Preprints to Doing Original Scroll

Greetings again, Dear Readers! Time for the next installment of Scribe Stuff. This time, as promised, I will show you just how simple it is to move from doing a preprint scroll to completing a “real” original scroll. Spoiler Alert: It is a baby step.

You will need the following equipment:

  • Calligraphy pen
  • Paint
  • Brush/es
  • Water cup
  • Ruler
  • Compass or circle template
  • Graph Paper

The one thing I hear as a Scribe Laurel is “oh, I will help paint preprints, but I am nowhere near good enough to do a “real” scroll.” This is second only to “I don’t do calligraphy” or “I don’t do illumination” or “I can’t do calligraphy/illumination because….” All of the above are nonsense. You can do them, if you choose to learn and practice. Practice is key, just like any other skill. There are other keys and we will cover some of them here.

Another key is “There is almost NO difference between working on a preprint and doing an original scroll.” This is especially true if you have done the line artwork or calligraphy for a preprint scroll before. Regardless, there is no reason to continue only painting inside the lines of preprinted scrolls forever, unless that is all you truly want to do. IF you want to move forward and learn to start doing some original work, this is the place to start.

Reference my prior Falcon Banner article “What Does it Take to Start Doing Calligraphy and Illumination”

The basic materials are the same – a calligraphy pen (dip or cartridge), a right angle, a circle (circle template or compass), graph paper, and a liner pen (Micron, Rotring Art pen, crow quill dip pen). Add the paints, brushes and water you would use to paint inside the lines to color a preprint, plus some gold and an appropriate white liner, and you have the basic makings of an original scroll.

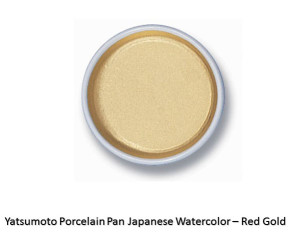
Yatsumoto Gold Watercolor Gouache in Ceramic PAn

Yatsumoto Gold Watercolor Gouache in Ceramic Pan – one of my personal favorite golds

There are some short cuts, which we will cover and some of which are even period to some extent. Cheating, by the way, IS period. After all, scribes of the Middle Ages simply copied text after text, making mistake upon mistake until we got documents essentially unrecognizable from the originals.

The start of a “real” scroll is exactly like that of a preprint, so refer to the Falcon Banner article for details. In short, I keep a sketchbook and a file folder of “good art” that I have done, others have done, inspiration material, etc. I have a resource list a mile long, Pinterest boards that are embarrassingly huge, and a library that could bankroll my retirement. There are a few essential books – such as Mark Drogin’s Medieval Calligraphy, which are absolutely required for calligraphers. The Craftsman’s Handbook by Cennini is another which I recommend you purchase early in your scribal career.

The Craftsmans Handbook - Cennini


I lay out the basics of the scroll – margins, space for artwork and space for text – first on graph paper. Then I find a font on the computer that approximates the one from period that I want to use. It may not have all the finery and so forth, but the roundness or lack thereof, the spacing of the letters, and the “time period feel” are all similar to that of the final scroll I envision. I play around with the scroll text in MS Word, using the font choices. I have spent too much time on the Internet, downloading and installing medieval styled fonts, so I have something like 200+ from which to choose.

I work with the text to get it sized, spaced (both words AND letters, as well as between lines) correctly for the space involved, and print it off underlined when it fits the final form. Why underlined? All the easier to line up with my graph paper, of course! Why make it harder?

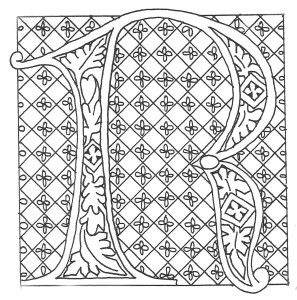
I also increase the same font and change the font style to outline for any rubricated (decorated) capital letters that the scroll will include so they will match the text. I make sure these are the approximate size I need for the final scroll, and print these too.

(c) Holly Cochran 2016

(c) Aidan Cocrinn OL, mka Holly Cochran 2016

In the end, I have balanced blocks of text as well as larger initials ready to be added to the graph paper rough draft. Remember – we are still in the phase that matches the preprint design stage exactly.

Next, I review my source books, online sources and stored drawings and other resources for inspiration and design elements appropriate to the text and time period. If there is an Order Badge to include in the design, I make the decision whether to include this as a badge per se or as the main charge (i.e. a Pelican) woven throughout the overall design. Either is appropriate for a GoA or Peerage scroll.

If I am using just the badge, I can print these directly from the Kingdom heralds page (Calontir Armorial – Awards and Badges).   This also has the individual armory of each person with a registered device in picture form as well as heraldese).  I call these sites my Electronic Apprentices.

I can download, save and desaturate (turn into black and white line drawings) any of the badges of Calontir awards, or of the various members of the populace. I can also save and print them as full color drawings. I can resize them until they fit the spaces of my design, print, then cut and paste into the graph paper rough draft.

Mallet - Blank Border Art by Lucinda

Leather Mallet artwork by Lucinda Whyteland
® Lucinda Wilson 2016

Your rough draft, with its pasted text, badge, and possibly the recipient’s own device, is starting to look pretty rough indeed at this point. All is well. You are nearly done with this phase. All that is left is to connect the spaces between any large capital letters and the device or device motif.

This can be done with vine work (see WHEE demonstration and practice for tips on how to stay loose and make great circles and loops), Celtic knot work, diapered and gold-worked bar and ivy designs and more depending on the style of the scroll. The style must be consistent with the style and time frame of the text.

I often take inspiration from my various resource materials such as my personal collection of copies and books, as well as from online sources and additional research. I personally think it is important to make note that this work is based on, including the name of extant work/s from period either in a separate document attached to the scroll or written lightly in pencil on the back of the final scroll. The same goes for credit to the text writer.

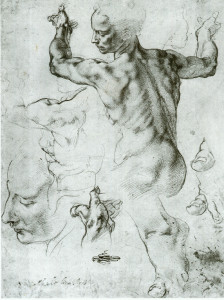
Now is the place for your next major scroll hack or “cheat,” which is not really a cheat at all. Period scribes were known to trace – this is well documented. At times, they covered the back of their sketched work with colored chalky pigment, and then traced the design lightly using a stylus onto the “good paper.” Referencing the sketchbooks of Michelangelo, Durer and many others gives you an idea of just how much of this kind of transfer occurred.

Michelangelo – Sketch for Sistine Chapel

Michelangelo – Sketch for Sistine Chapel

Another method used was to place the rough draft over the good piece of paper and trace over the design with a sharp pen or crown quill, or poke holes around the design to make indents where scroll text and design elements are intended. In period, scribes would use glass windows or tabletops, or they would use pins to prick the design throughout to use as a “connect the dots” method of tracing the image from rough draft to final page. Regardless of the method, short of photocopying one to the other, it is pretty much period. Using a glass-topped scribe’s desk with a low-heat emitting LED light-pad, I transfer the image from the rough draft to the “good” paper.

Once the design and calligraphy are transferred to the good paper, I use the ink calligraphy pen -mine is a Rotring Art pen, and the liner pen such as  the Rotring Art Pen sketch pen or the Micron liner pen, to trace the design onto the good paper. I have now essentially created the master copy of a preprint scroll, if this were not to be a Grant or Peerage level original scroll to award.

Once the black ink is very thoroughly dry, I can begin illumination work on the piece. I review my references once more, for colors and shading used and other things unique to that style of art. For instance – what was done in early Irish manuscript painting around 500-700 A.D. was not nearly the same as 1500-600 A.D. Ireland! One should never mix time periods that far apart. I keep mine within about 50 years of each other. Whenever possible, I refer to the original source. Online research libraries are a huge help for this – allowing us to see things we never saw before!

Book of Kells

Book of Kells

Illuminating my line-drawn design is no different from painting in a preprint. I use the same materials – gouache paint, for the most part, and gold gouache, leaf, or other gold supplies if needed for illumination, and a way to create white line, bar and ivy work as needed. I also work my paints to develop both a mid-tone as well as a light and dark tone for the colors in use, especially clothing drapery, faces, hair, etc.

Start with the gold work, as a rule. Other paints to do not stick to gold and you need to make absolutely sure the gold is done correctly. Learn to use either gold gouache, Sumi-e gold paint, or gold leaf techniques. None is particularly hard, but they are costly and time-consuming.

Once the gold is applied and trimmed so that the black lines around it show, I add the paint. I start with the lightest paint base colors and move towards darker shades as each element in the scroll is completed. The reasoning for this is simple – dark paint covers errors made with lighter paint. Trying to fix errors the other way ’round doesn’t work as well. I try to work around the scroll, completing one element or feature at a time, rather than doing “all the greens at once,” and then “all the reds” next.

Once all the initial layers of paint and calligraphy ink have dried, while the scroll is lying flat between two sheets of absorbent cotton or fiber towels (because, cats), I take the opportunity to clean up my workstation. I review my material and make sure the colors and design I used match with the text written and style desired by the recipient.

This is the time to add personalizing touches to the scroll. Is the recipient’s heraldry displayed somewhere? Do they belong to a household; are they also great at some other skills? Show those in the illumination, too. Add diaper patterns, highlights, low lights shading etc. to finish the scribery.

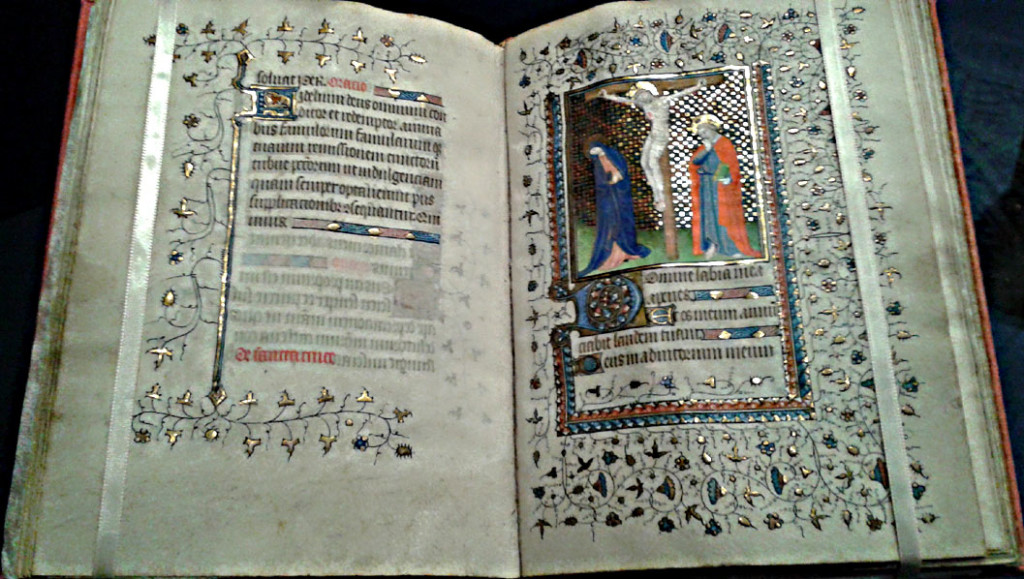
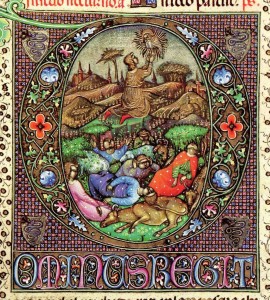
Elaborate piece from the Visconti Hours

Elaborate piece from the Visconti Hours


Finish up by cleaning up any messes on the scroll – a Q-trip dipped in bleach then gently rolled across the surface of the paper wonders for this. Be sure to blot the area with a dry paper towel to remove excess fluid and help dry the paper. When it is very dry, buff it out with a light application of the white rubber eraser to restore the “tooth” of the paper.

The very end phase, once everything is completely dried, is to spray a light coating of Workable Fixatif on the surface of the scroll. This product ensures minor drips of sweat will not ruin the scroll, nor impair the ability of Their Majesties to sign the thing before Court. Gently erase all pencil lines with the white rubber eraser before applying the spray. If a line or image drawing will not erase completely, do not worry and leave it be. Do not scrub at it and make the problem worse.

Do a final check of your work. Does it meet the requirements of the recipient, or their sponsor and the Order? Does the time period of the text agree with the time of the illumination? Is the badge of the Order correct? Are there places where the outline needs a touchup?

Now, walk away from the work for at least a day. Do not look at it. Do something completely non-scribal. Come back and look at the work with fresh eyes after a time. Recheck the work again, find any last fixes to fix – try those erasures again, clean up smudges, that sort of thing. Do not try to rework the illumination. At most, add a bit of white work if the illumination requires it, but nothing more than embellishments.

Add your maker’s mark to the front of the scroll and write “Scroll done by …” and your name in pencil on the back of the scroll. I like to add any sources I used, such as “based on the Lindisfarne Gospel, panels 9 and 22” or something like that. If someone else wrote the text, also write their credits on the back of the scroll in pencil.

Take at least one good quality photo of the scroll that shows the entire item. Also, take close up shots of any detail work. Start a portfolio of your work on your computer. Save the graph paper version rough draft of the scroll, and copy any favorite elements to your sketchbook or model book.

Best Scroll I've Ever Done I Think

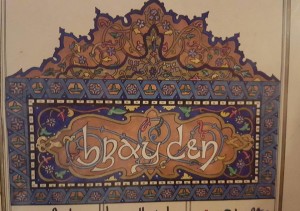
Top Piece of Duchess Brayden’s Scroll                                                                (c) Aidan Cocrinn mka Holly Cochran 1993


Print 2 copies of the text in a simple typeface such as Arial or Calibri font, size 14 or so, one for the voice herald and one for the silent herald. Deliver the scroll and plain texts to the Royal Scribe.

Congratulations! You have completed a “Real Scroll” using nothing more than the skills you learned doing preprints.

Aidan Cocrinn, OL

55th Laurel of Calontir by the Grace of Conn and Sile

Royal Scribe to Their Majesties Matsunaga and Elena

First Cyborg Laurel of Calontir

Scribe Goob


Five Decades of Art History from the Metropolitan Museum of Art Now Free

The Metropolitan Museum of Art has made available over 450 publications on art history, stretching back over 50 years. The publications appear to be available as downloadable PDF files,  viewable online (Google Books) or print on demand.  http://www.metmuseum.org/art/metpublications/titles-with-full-text-online?searchtype=F&rpp=12&pg=1


http://www.metmuseum.org/art/metpublications/titles-with-full-text-online?searchtype=F&rpp=12&pg=1

Life Before Toilet Paper

Reposted from the East Kingdom Gazette:


Arts & Sciences Research Paper #7: Life Before Toilet Paper


Life Before Toilet Paper

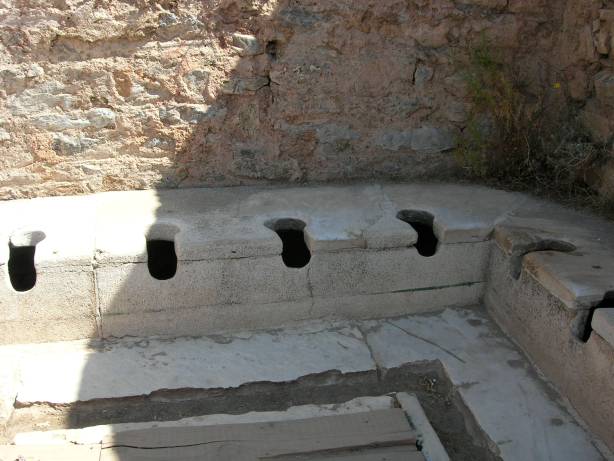
Ancient public toilets in Ephesus

Ancient public toilets in Ephesus


There are some things in our society that are so basic, so integral to our lives that we cannot imagine going without.  Toilet paper is one of these items.  Since 1857, when toilet paper first became commercially available, we have used it to cleanse after using the bathroom.  This begs the question; what did people use to clean themselves before toilet paper?  This work will provide an overview of what people used to cleanse themselves after defecating in Rome, China, Japan, India, the Islamic states and various areas of Europe between 400 C.E. and 1600 C.E.

Contents
Rome
Buddhist Precepts for Monks in India
Islamic Precepts for Worshippers
Japan
Western Europe
China
Bibliography
Notes

Rome
We begin in Rome, in the communal toilets adjacent to the city’s bathhouses.  These communal bathrooms were semi-circular or rectangular rooms containing long benches along the walls, with individual round spaces carved into them.  Running water flowed underneath them to wash away the waste.  According to William E. Dunstan in his book Ancient Rome, “Public latrines, though often lavishly decorated with statuary and singing fountains, proved dimly lit and poorly ventilated.  They became overcrowded retreats for the unprivileged living in multistory tenements lacking toilets.” [1]

Lucius Annaeus Seneca, in his series of letters known as Moral Letters to Lucilius references a sponge affixed to a stick as being used for cleansing after defecating.  In his 70th letter, he relates a tale of suicide in which this implement, commonly referred to by scholars as a spongia, played a pivotal role.  “A captured German, who was making ready for the morning exhibition, withdrew in order to relieve himself, the only thing he was allowed to do in secret and without the presence of a guard.  While so engaged, he seized the stick of wood, tipped with a sponge, which was devoted to the vilest uses, and stuffed it, just as it was, down his throat…”[2]  To date, there appears to be no other specific reference to the spongia in ancient text.

Sources speculate that the spongia would be stored in either a bucket of salt water, or would be placed in front of the public toilet in a stream of running water that ran in front of the commode in communal bathrooms.  These spongia were used by everyone who utilized the public toilets.

The Roman elite used chamber pots or toilets within their own homes instead of using the communal commodes whenever possible.  Instead of the spongia, it is conjectured that they cleansed with rosewater and soft wool while in their homes.[3]
Back to Top

Buddhist Precepts for Monks in India
We move from Rome to India, where Buddhist monks were fastidious about cleanliness.  So fastidious, in fact, that they had very particular rules regarding the use of the bathroom.  These rules are outlined, in detail, in early versions of the Vinaya Pitaka, the Buddhist canonical for monks.  Each of the seventeen rules were to be followed each time one used the toilet facility.

  1. One should not defecate outside of the cesspool.
  2. While standing outside, one should clear his throat.
  3. Anyone sitting inside should also clear his throat.
  4. Having put aside the (upper) robe on a bamboo pole or a cord, one should enter the place properly and unhurriedly.
  5. One should not pull up one’s lower robe before entering.
  6. One should pull up one’s lower robe while standing on the toilet shoes.
  7. If the place is splattered it should be washed.
  8. One should not groan or grunt while defecating.
  9. One should not wipe oneself with a rough stick.
  10. One should not drop the wiping stick into the cesspool.
  11. If the basket for wiping sticks is full, the wiping sticks should be thrown away.
  12. One should then cover oneself (with one’s lower robe) while standing on the toilet shoes.
  13. One should not leave hurriedly.
  14. One should not leave with one’s lower robe pulled up.
  15. One should pull it up while standing on the rinsing-room shoes.
  16. One shouldn’t make a smacking sound while rinsing.
  17. One should not leave any water remaining in the rinse vessel.[4]

Further evidence to the Buddhist doctrine of cleansing after defecation is found in an anecdote within their guidelines for monks which tells a story of the consequences of not rinsing oneself after defecating:

“Now at that time a certain bhikkhu, a brahman by birth, didn’t want to rinse himself after defecating, (thinking,) ‘Who would touch this vile, stinking stuff?’ A worm took up residence in his anus. So he told this matter to the bhikkhus. ‘You mean you don’t rinse yourself after defecating?’ (they asked). ‘That’s right, my friends.’ Those bhikkhus who were of few wants … criticized and complained and spread it about, ‘How can a bhikkhu not rinse himself after defecating?’  They reported this matter to the Blessed One…”[5]

The monks utilized what they referred to as a wiping stick to scrape feces after defecating.  The stick was smooth and slightly rounded, and was used to remove large pieces of feces before the monks rinsed themselves with water.
Back to Top

Islamic Precepts for Worshippers
Buddhism is not the only religion that has strict rules about personal hygiene.  Worshippers of Islam had similarly stringent requirements for cleanliness.  The Qur’an is adamant about personal hygiene, which is why it is not surprising that Muslims also had very specific rules when it came to cleansing after defecation.  Abu Hureyrah, companion to the prophet Muhammad, narrated many edicts to the followers of Islam; cleansing after defecation included, between 590 and Muhammad’s death in 632 C.E.  “When any one of you goes to the Gha’it (toilet to defecate), let him take with him three stones and clean himself with them, for that will suffice him.”[6] He also stated, “I never saw the Messenger of Allah come out of the toilet without first (cleansing himself) with water.”[7]

Rules, based on the narrations of Abu Hureyah, are outlined in Qadaa’ Al Haajah.  A redacted set of these rules is itemized below.

  1. When entering the toilet, one should say the A’udhu (isti’adha) and Basmalaand then recite a prayer.
  2. When entering the toilet, one should not have in one’s hand anything on which the name of Allahu ta’ala or any verse of the Qur’an al-karim is written.
  3. One should enter the toilet with one’s left foot and exit with one’s right foot.
  4. One should recite the prayer “Alhamdu-lil-laa-hil-la-dhi adh-haba ‘a-nil a-dhaa wa ‘a-faa-ni” when exiting the toilet.
  5. After cleaning one’s private parts, one should cover them immediately.
  6. One should neither face the Qibla nor turn one’s back toward it while urinating or defecating.
  7. One should remove the feces on one’s anus with one’s finger and wash one’s hand. If there are still traces of filth, one should wash them with water.
  8. One should dry one’s private parts with a cloth after washing them.
  9. One should not look at one’s private parts or spit into the toilet.
  10. One must not urinate into any water, on a wall of a mosque, in a cemetery, or on a road.
  11. Cleaning the private parts with stones and similar materials is an acceptable substitute for cleaning them with water.[8]

One will note that the process of cleaning oneself after defecating is specifically addressed.  The utilization of one’s own hand appears to be the preferred method, followed by rinsing and washing the hand.


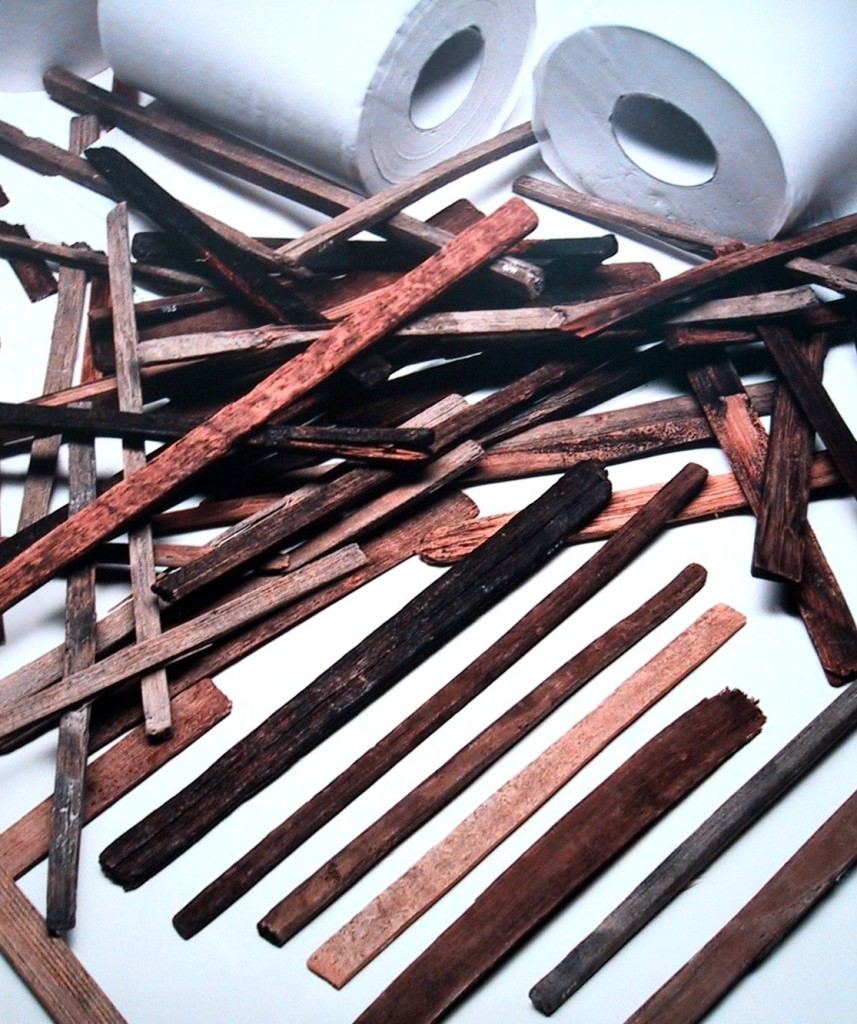
Japanese wiping sticks. This Wikipedia and Wikimedia Commons image is from the user Chris 73 and is freely available at //commons.wikimedia.org/wiki/File:Nara_period_toilet_paper.jpg under the creative commons cc-by-sa 3.0 license.

Japanese wiping sticks.

Back to Top

Japan
The Japanese, like the Indian Buddhists, used sticks to clean themselves after defecating.  Flat, rounded sticks, called chu-gi, were uncovered in ancient cisterns dating as far back as 750 in the ancient Japanese capital of Nara.  During what is called the Nara Period, between 710 and 784, the capital had 10-15cm trenches dug and water diverted through them, making a drainage system.  Citizens would squat over these trenches, with a foot on each bank of the trench to urinate and defecate; the waste being washed away from the city.  The dirty sticks would be washed in the running water, and retained for future use, or dropped in the trench for disposal.[9]
Back to Top

Western Europe
In Western Europe, materials available for sanitation varied based on your wealth and social standing.  It is conjectured that rags were used throughout Europe and were the most common materials used for anal cleansing.  Ronald H. Blumer states his work entitled Wiped:  The Curious History of Toilet Paperthat clothing too threadbare to be worn would be utilized for anal cleansing repeatedly until it was no longer fit for that purpose as well.[10]  Archeological digs under monasteries in Europe have found remnants of the tattered, holey rags used by monks and nuns for toilet purposes.  Finer wools and linens worn by the elite were used for their sanitary needs once they were no longer suitable to be worn as clothing.

Not everyone used rags, however.  In the household records of Duc de Berry in 1400, for example, there is reference to quantities of flax and hemp being purchased in a raw, unspun state for the express purpose of anal cleansing.[11]  And though few household records like these have survived, literature has.  Toilet humor–also known as scatological humor–is not a wholly modern notion.  La vie de Gargantua et de Pantagruel, written by François Rabelais between 1532 and 1564, was full of scatological humor.  Chapter 1.XIII, “How Gargantua’s wonderful understanding became known to his father Grangousier, by the invention of a torchecul or wipebreech” is a perfect example.  This chapter of the famous work is solely dedicated to the discussion of anal wiping:

“I have, answered Gargantua, by a long and curious experience, found out a means to wipe my bum, the most lordly, the most excellent, and the most convenient that was ever seen.  What is that? said Grangousier, how is it?  I will tell you by-and-by, said Gargantua.  Once I did wipe me with a gentle-woman’s velvet mask, and found it to be good; for the softness of the silk was very voluptuous and pleasant to my fundament.  Another time with one of their hoods, and in like manner that was comfortable.  At another time with a lady’s neckerchief, and after that I wiped me with some ear-pieces of hers made of crimson satin, but there was such a number of golden spangles in them (turdy round things, a pox take them) that they fetched away all the skin of my tail with a vengeance.  Now I wish St. Antony’s fire burn the bum-gut of the goldsmith that made them, and of her that wore them!  This hurt I cured by wiping myself with a page’s cap, garnished with a feather in the Switzers’ fashion.

“Afterwards, in dunging behind a bush, I found a March-cat, and with it I wiped my breech, but her claws were so sharp that they scratched and exulcerated all my perinee.  Of this I recovered the next morning thereafter, by wiping myself with my mother’s gloves, of a most excellent perfume and scent of the Arabian Benin.  After that I wiped me with sage, with fennel, with anet, with marjoram, with roses, with goud-leaves, with beets, with colewort, with leaves of the vine tree, with mallows, wool-blade, which is a tail-scarlet, with lettuce and with spinach leaves.”[12]

By the end of his diatribe, there is seemingly nothing that the young man won’t use.  In fact, when he comes to wiping with paper, he has this to say, “Who his foul tail with paper wipes, Shall at his ballocks leave some chips.”[13]

Though a humorous work of fiction, it does provide insight to what might have been used for anal cleansing.  The author is clearly utilizing the absurd in the name of his art, but it is not unreasonable to take grains of truth from the document.  It is quite likely that leaves, moss, straw, discarded pieces of clothing, etc. would have been utilized by all walks of life depending upon their region and the materials available to them.

It is suggested in numerous works on the subject that leaves, moss, shells, and the like would have been used for cleaning after defecation, though none of these works have been able to provide evidence to support their assertions.  It is not unreasonable, however, to make such a conjecture.  A soft leaf, unspun wool, and straw would have proved to be useful if no other means of cleansing were available.
Back to Top

China
While their Western counterparts were using leaves, rags, or sponges soaked in saltwater, and other areas of Asia were using sticks to clean their anuses, the Chinese were manufacturing paper to address their sanitary needs.  There is little written on the invention, manufacture, and use of the predecessor to the modern toilet paper, but there is mention of paper being used in the eliminatory process as far back as the first century.  Joseph Needham, in his collection of works entitled The Science and Civilisation of China, cited that the Chinese used paper made from rice straw for sanitary purposes.  Chinese scholar Yan Zhitu stated in 589 that “paper on which there are quotations or commentaries from Five Classics or the names of sages, I dare not use for toilet purposes.”  Additionally, an Arab explorer during the Tang Dynasty, is noted as having stated “They [the Chinese] are not careful about cleanliness, and they do not wash themselves with water after they have done their necessities, but they only wipe themselves with paper” in his memoirs detailing his travels to China.[14]

The Chinese eventually began manufacturing a specific type of paper to use after defecation, known as tshao chih.  According to Chinese records maintained by the Imperial Bureau of Supplies, over 720,000 sheets of tshao chih were manufactured in 1393 alone.   The imperial family, however, received “…15,000 sheets, three inches square, light yellow, thick but soft, and perfumed.”[15]  In fact, the use of tshao chih was so prevalent, Zhejiang Province (aka Chekiang Province) alone used ten million packages of 1,000 to 10,000 sheets in 1393 for its population of 2,138,225.[16]

Until the 19th century, paper was made exclusively by hand, and therefore, was more expensive to procure.  It would have been more cost effective to use materials that were readily available, such as leaves and old rags instead of paper.  As paper became easier and less expensive to manufacture, its use for cleansing after defecating became more common and eventually took its place as the preferred method for cleaning in most parts of the known world.  Today it is estimated that modern Americans use approximately 100 rolls of toilet paper per year.  With nearly 390,000,000 people in the US, Americans use 39,000,000,000 rolls of toilet paper each year.
Back to Top

Bibliography

Bennett, Howard. “EVER WONDERED about the history of toilet paper?” The Washington Post (2009): 1-2.  Accessed 10/27/2014.

Bhikkhu, Thannissaro, ed.,  The Buddhist Monastic Code II. Thanissaro Bhikkhu, 2001.

Blumer, Ronald, H. Wiped:  The Curious History of Toilet Paper.  CreateSpace Independent Publishing Platform; 2nd edition, 2013

Chavez, Amy “From the ditches of nara to the Otohime, a lav story” The Japan Times (2014): Accessed 12/27/2015

Dunstan, William E. Ancient Rome. Plymouth: Rowman & Littlefield Publishers, Inc., 2011.

Guanglin Liu, William. The Chinese Market Economy, 1000-1500.  Albany, NY: State University of New York Press (2015).

My Religion Islamic. “Islamic Toilet Etiquette” (2015):  Accessed 12/28/2015

Needham, Joseph. Science and Civilisation in China, Vol. 5, Part 1:  Cambridge:  Cambridge University Press, 1954.

Rabelais, Francois; Translation by Sir Thomas Urquhart of Cromarty. Gargantua et de Pantagruel: 1653

Schofield, Hugh. “Filthy secrets of medieval toilets” BBC News (2003):  Accessed 10/27/2014

Seneca, Lucius Annaeus. “Moral letters to Lucilius” Letter 70 :  Accessed 02/15/2016

“The Hadith of the Prophet Muhammad at Your Fingertips”: Accessed 02/15/2016

“Islamic Toilet Etiquette“: Accessed 02/15/2016
Back to Top

Notes

[1] Dunstan, William E. Ancient Rome, pg 359.

[2] “Moral letters to Lucilius/Letter 70”

[3] Dunstan, 359

[4]Bhikkhu, Thannissaro, ed.,  The Buddhist Monastic Code II, pg. 108

[5] Ibid, pg. 107.

[6] Vol. 1, Book 1, Hadith 44 

[7] Vol. 1, Book 1, Hadith 354

[8] “Islamic Toilet Etiquette“ 

[9] Chavez, Amy “From the ditches of Nara to the Otohime, a lav story” The Japan Times

[10] Blumer, Ronald, H. Wiped:  The Curious History of Toilet Paper

[11] Ibid

[12] Rabelais, Francois, La vie de Gargantua et de Pantagruel Chapter 1.XIII

[13] Ibid, pg 78.

[14] Needham, Joseph Science and Civilisation in China, Vol. 5, Part 1

[15] Needham, 123

[16] Guanglin Liu, William The Chinese Market Economy, 1000-1500, p 13 Appendix A


Halvgrimr’s Hall: a Viking Age Hoard of Information

Halvgrimr’s Hall is a Facebook blog page with the stated purpose “A blog where I intend to document my attempts at Living Heroically both in and outside my hobby. I hope my efforts inspire others to do so as well.”

The blog covers many areas of Viking Age reenactment, but most prominent is the extensive research and discussion regarding finds of helmets of the period. Extensive articles on the Vendel Helmet 14, the Sutton Hoo helmet, and pointers to resources for further research are just a few of the items available.

Halvgrimr says he also does “a weekly coverage piece on various ‘Viking Age’ helms and I hope to keep that running even after I run out of extant pieces”

If you are interested in Viking Age research, and especially extant helms, but sure to check out Halvgrimr’s Hall.

Scribe 101: What Does It Take To Start Doing Calligraphy and Illumination

Most of you, Dear Readers, won’t believe me when I say the basic materials for starting your career as a scribe are incredibly minimal. Primitive, perhaps, is a more apt word.

Many protest they cannot Scribe because their handwriting is horrific and they have no artistic skill. Handwriting is irrelevant, as is your artistic talent and even whether you are left or right handed. What matters is the willingness to learn and practice, openness to trying a new skill and the ability to understand the difference between handwriting and the Scribal Arts.

I’ve been doing this for more years than I’d care to admit. In a pinch, it takes very little to draw pretty letters and make a decent-looking scroll, even under less than ideal conditions. One of my articles down the road will cover “Combat Scribing: The Art and Science of Doing a Scroll under Horrible Conditions.” This is also known as doing a last minute scroll at Lilies War.

My Rolling Scribe Box looks just like this, except it is camo green.

My Rolling Scribe Box looks just like this, except it is camo green.

You do not need my rolling Scribe Box of Wonders, plus a home scribe room full of more cool stuff to do scrolls. At some point, more stuff becomes a distraction. We will start with the bare basics. This series will build from there. Eventually, you will find personal favorites to add to your Kit, as well finding things you feel convenient or helpful beyond the basics.

The Scribe’s Library will grow, too. Invest in Amazon Prime, and learn to scour every method of acquiring good quality used books, as well. Bargain shopping for books will serve you well for your entire Scribe career.

At the end of this article, I list some online resource and essential Scribe books. Always seek online coupon and discount codes before shopping. Free shipping is the most common. Some merchants have begun to recognize the SCA as a significant constituent and offer an SCA discount at checkout. Ask for it. Join all the SCA Scribes related Facebook groups you can find, and get hooked on Pinterest Scribe boards for more online inspiration and resource generators.

Even a few decades ago, these resources were not available, yet now they are lifesavers. Find the online digitized manuscript treasuries and bookmark them. Take classes at RUSH (Royal University of Scir-Havoc) or elsewhere, plus ask a more experienced Scribe if you can sit with them and ask questions. After all, most Scribal Arts are done alone, at home, in our workshops. It is much akin to raising small children– after a while; Scribes long for adult conversation!
Scribe MAterials

Bare Bones Scribe Materials

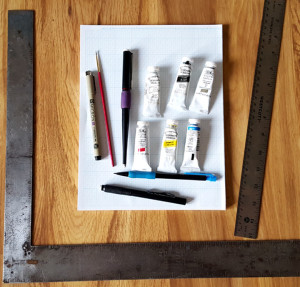
Shown above – a right-angle, a straight edge, graph paper, a calligraphy pen, a liner pen, a pencil, a white eraser, a paint brush, and gouache in the three primary colours (red, blue, yellow), plus zinc white, lamp black and gold.

The materials pictured above, with the addition of an un-wobbly workspace, light, a water cup, a palette for mixing paint and the final scroll paper of the Scribe’s choice, are the bare minimum requirements for being a scribe. True story.   There are many other pleasant, helpful, and nifty things a Scribe can use to create lovely scrolls. The things in the photo, however, produce just as beautiful a scroll when used to correct effect.

Let us begin.

Calligraphy is not handwriting.

Calligraphy is drawing letters. For this reason, your handwriting matters not, nor does your dominant hand. Practicing on graph paper is the single best way to learn calligraphy, learn it correctly and of getting it right, I have ever discovered. Use the cheapest Dollar Store on sale graph paper imaginable and achieve the same muscle-memory excellence as if you purchased specialty “practice paper” from an art store. Save your money, buy the cheap graph paper.

I taught myself to do calligraphy left handed simply to be able to teach lefties. There are left-handed calligraphy nibs and right-handed nibs. Please purchase the ones appropriate to your handed-ness. It truly helps.

Using a calligraphy pen to draw letters involves following the strokes indicated in a teaching manual for calligraphy. I recommend a beginner book such as Medieval Calligraphy: Its History and Technique by Marc Drogin. This shows a variety of scripts and breaks them down stroke by stroke. It also shows the exact pen-tip (nib) placement, letter height, and historical examples of each script. Many other beginner texts exist, too. The Drogin book is just one of the better known and most available.

Illumination does not require artistic talent.

Illumination requires the ability to use basic tools such as a straight edge, and the ability to create a model book or exemplar from doodles and period works. A sketchbook of your best doodles, photocopies of the devices of the Kingdom awards, various heraldic animals, Celtic knot work, swirly vines and acanthus leaves, fancy illuminated initials and so forth, will be your best travel companion. Bored at Court? Sketch. Sketch letters, designs, things you have seen. Practice that Tudor Rose or another motif you saw at the event.

Celtic knot work, the subject of a later article, is merely drafting and dots, by the way. Do not be intimidated. It is ridiculously easy once you know the tricks. After all, if we Irish could do it, anyone can do it. Look online at Michelangelo’s sketchbooks. They were designed to get the proportions and placement of his figures correct, not to be as beautiful as his finished work. When called upon to create a scroll, you will have an idea book of sketches and designs ready.

Illumination also requires the ability to manipulate a paintbrush and to color within the lines. Most of us learned these skills in primary school. We perfect these through practice. Practice is widely available in the Calontir Scribal world by helping the Royal Scribe paint pre-print scrolls. These are scrolls in which the calligraphy and line art for the illumination has already been done by another Scribe, and then photocopied onto heavyweight paper. Beginning (and sometimes also advanced) Illuminators paint the preprints using gouache paint, just as they would paint an original scroll.

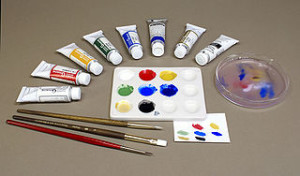
What is gouache?

Gouache is opaque watercolour, created by combining finely ground pigment with binders and then either partially dried and stored in a tube, or completely dried into a pan. The colors in my photo above are Windsor and Newton Artists Gouache. Many of the Windsor and Newton line use period pigments and binders such as gum Arabic. Some period pigments, such as Lead White, are also available\ and come with safety warnings.
Gouache

You can also use regular transparent watercolour on a scroll. I used authentic Japanese-made watercolours when creating both His Majesty’s Chivalry scroll and Uji-Two’s Torse scroll. They work well. Chinese ink stick colors work well, too. Some calligraphy-specific coloured inks give good colour to scrolls. Personally, I avoid acrylic or oil colour for basic SCA scrolls. They may be appropriate for some kinds of non-traditional scrolls, however.

A word about calligraphy pens

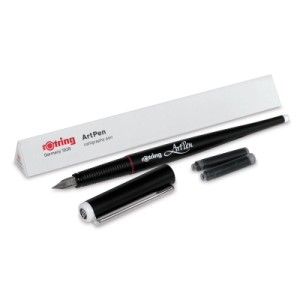
Yes, Dear Readers, I use a cartridge pen for 99% of my scroll work. I do this for several reasons. The pen I use is a Rotring Art Pen. It contains archival quality ink, fits nicely in my arthritic hand, and is  completely reliable. The stainless steel nibs refuse to die. When I packed up from the Barony of al-Barran in the Outlands 10 years ago, I left ink cartridges in the pens. There they stayed for about six years. Do NOT do this.

When I was strong enough to try Scribing again, I opened the pens and removed the old ink cartridges. I washed out the nibs, put in new ink and nine of 11 of the pens worked as if they were brand new. I cannot say the same for any other brand of pen, including dip pens, I have ever owned.
Rotring Art Pen

Can I use a dip pen? Of course. But I hate them. Should you learn to use them and use them well? Of course. They are far more period than my cartridge pen. There is no rule that says you must start with a dip pen, or a quill pen, or anything in particular. I simply request you not learn calligraphy using a calligraphy marker, because they do not enforce correct technique.

The correct technique with a calligraphy pen is to draw each stroke of the pen either towards the body or towards the hand, whenever possible. To push the stroke of the pen away from the hand or body often causes the pen to “barf” or “splat” on the paper. Practicing a consistent pressure using whatever pen you choose is more important, combined with practicing letter spacing, equal letter height and the wide/narrow aspect of letters.

Basic_Strokes

This is where the graph paper comes into play. Graph paper has lines, horizontally and vertically. It makes letter height, spacing and so forth much easier while saving time drawing lines on blank paper. You can certainly draw those lines if desired. For practice time, I would prefer you spend the time practicing rather than drawing straight lines using a ruler.

Every Scroll is a Franken-Scroll

Tracing is period. Really. It is why Scribes had exemplars, model books and so forth. Designs were used and re-used. Particularly complicated pages were laid out, proportioned and set up on cheaper material than the “good” paper or vellum before ink or paint was ever laid on to the expensive stuff. We see evidence of graphite marks, pin-pricks and other tracing methods in period manuscripts.

I hope at some future RUSH sessions we can get into a University library’s manuscript/special collection to see actual period manuscripts as examples. We did this once upon a time, saw first-hand such things as tracery, the way paints lay on top of vellum, and the lack of perfection in medieval manuscripts that we still feel are marvels to behold.

Lay out or design the scroll on graph paper first. Cut and paste copies of sketches, award devices or recipient devices, knot work, vines or other designs on the graph paper using a glue stick or rubber cement. These adhesives allow some repositioning as you work, to take a trick from High School Journalism class. Lay out the text of the scroll using modern technology. Find and download a free font online that approximates the appearance – especially the letter and word spacing! – of the Scribal hand you intend to reproduce.

Keep in mind you will be making changes to that font to make it period as well as to make it your own. However, making sure the text will fit into your scroll is also important. Use your computer to size and resize the text in your font choice until it meets your needs. Once it does, print, cut and paste it into your scroll mock-up. When I do this, I print the font with an underline. This helps me align it with the graph paper lines of my mock-up.

Continue to play with your mock up, adding and subtracting elements as needed. If you need a picture of a person doing an activity, research period sources to find one that fits your scroll time and place. Save the photo to your computer, and then open it in your photo editor. De-saturate it so the photo is in black and white. Now you can resize the basic drawing to fit your needs, flip it, rotate it and manipulate it to your needs.

When you have the drawing in the basic size, shape and orientation needed, print it. Using a pencil, add the other elements you need, rearrange arms and legs, change garments, add weapons and so forth. Add a blank of the black and white figure to your exemplar book, too. Cut and paste the modified image into your scroll mock-up. Repeat as needed for other elements.
Rough Draft Matsunaga's Chivalry Scroll

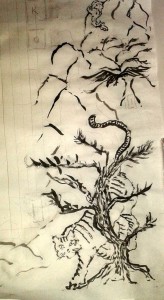
Rough Draft Matsunaga’s Chivalry Scroll


Note that you are NOT copying any page of an extant manuscript. You are taking elements, modifying them to suit the scroll recipient, creating what might be the missing page of that manuscript using your imagination and creativity. Neither are you copying your font printed off the computer. You are using it as a placeholder for your calligraphy hand and ensuring the approximate letter width and size fits in the space needed.

All of the above is done on graph paper, so there should be no excuse for things being off-kilter. You have your ruler, so you can determine the center of the paper and ensure a pleasing and well-thought-out design. You may need to draw circles. Please do not draw them freehand. A shot glass or the neck of an empty beer bottle are about the right size for the badge circles of most AoA or GoA awards. Later, you may want to invest in an architect’s circle template.

Sooner or later, the Franken Scroll mock-up has acquired a form that looks like it will work. It is time for it to move from graph paper to good paper. That, Dear Reader, is the subject of next month’s post.

In the meantime, practice drawing letters in the correct shapes on graph paper. Practice doodling medieval things – beasties, vines, flowers, knot work, Norse long-boat crests, you name it – in your sketch book. Acquire a few basic tools. Visit some resources online and start looking for repeating themes within the same time frames. See if you can spot elements that appear again and again. Perhaps download a color wheel and some information about colour theory. After all, if all you have are the primary colours, you will need it soon!

Look at the calligraphy. Spot how it is drawn, not written. You may even see outlines of letters, later filled in with ink. Hmmmm – drawing letters. Intriguing. You will see graphite guidelines for letters. Notice the differences between early period calligraphy vs. later period Gothic quadrata styles resembling nothing so much as a picket fence. The skill there is drawing many straight lines, equally spaced, and being able to track where to connect the vertical lines to make letters.

Until next month, Dear Readers, here are some resources to take you down the Scribal Rabbit Hole. Email me any time with questions .

I always remain in service to Crown, to Kingdom and the People of my Home, my Beloved Calontir –

Aidan Cocrinn, OL
55th Laurel of Calontir by the Grace of Conn and Sile
Royal Scribe to Their Majesties Matsunaga and Elena
First Cyborg Laurel of Calontir
Scribe Goob
Etc.

hcochran@gmail.com

Resources:

Art Supplies:

John Neak Bookseller THE go-to SCA Scribe place
**Remember to request the 5% SCA discount in the Order Comments Box**

Guild Mirandola –paints, pigments, gold leaf, parchment, Pennsic

Paper and Ink Arts – go to supplier for most stuff

Guild of Limners – pigments, vellum, Pennsic

Cheap Joe’s – basic art materials, cheap

Jerry’s Artarama– more basic materials, always sales

Dick Blick – all the art supplies

Digital Resources:

Left Handed Scribe Tutorial

Folump Enterprises (buy Crossed Quills, if you can get them!)

The Hours of Henry VIII

Michaelangelo Sketchbook article

The Art of the Booke

The Digital Medievalist

Medieval Illumination (blog)

ScribeScribbling – the blog of Ian the Green

Sexy Codicology

The Pensive Pen

Falcon Scribes Facebook Group

SCA Scribes and Illumination Facebook Group

SCA Scribes Facebook Group

SCA Scroll Gallery Facebook Group

Aidan’s Pinterest – see if you can find and follow all the Scribal Pinterest Boards, then follow the other Scribes you find. Warning: Addictive.

Calligraphy:
SCA Calligraphy Bootcamp
Ductus – Line Drawing Template
Calligraphicga this form of writing we do

Illumination

Book of Durrow
Creating Period Pigments

Calontir Resources:
Calontir Order of Precedence – look up names
Calontir Armorial – look up registered devices
The Vatican Library Digitization Project

The Vatican Library Digitization Project ( http://digital.vatlib.it/en/ ) is in the process of scanning, saving and distributing the Library’s collection of documents, with over 4400 of them currently available online.

Documents range from the pre-Columbian Aztec “Codex Borgianus,” to the Mishneh Torah, to fragments of the Koran Kufic, to Virgil, the Iliad and various Bibles. The stated purpose of the project is to preserve all human heritage for posterity and make it available to the public.

Duke Finvarr’s Books on Chivalry

Duke Finvarr de Taahe, a good friend of Calontir, has created a website listing his books on chivalry and where they can be purchased:

http://smuhlberger.weebly.com/books-on-chivalry.html

Finvarr is, modernly, an historian named Steve Muhlberger, and the website also includes other sections which reference his books and articles on the history of democracy, 5th C. Latin chronicles. and much more.